Getting started
There are two ways in. The atlas plugin runs inside the agent you already use and needs nothing installed on the machine. The CLI adopts a repository for the full workflow: hooks, the agent contract, sessions and the dashboard. Many people start with the plugin and add the CLI later.
Start from your agent: the atlas plugin
The atlas plugin reads a repository, writes its first spec tree, draws a diagram for each node worth one, checks every diagram until it passes, and hands back a page you can open. It runs SpexCode through npx, so there is nothing to install or configure.
# Claude Code
claude plugin marketplace add shuxueshuxue/spexcode-plugins
claude plugin install atlas@spexcode
# Codex
codex plugin marketplace add shuxueshuxue/spexcode-plugins
codex plugin add atlas@spexcode
Then run /atlas in any repository.
The first adoption uses spex init --pure: plain .spec/ files in Git, no hooks and no agent configuration. The tree it writes is the same asset the CLI works with, so adopting the repository later with spex init --harness … keeps it as it is.
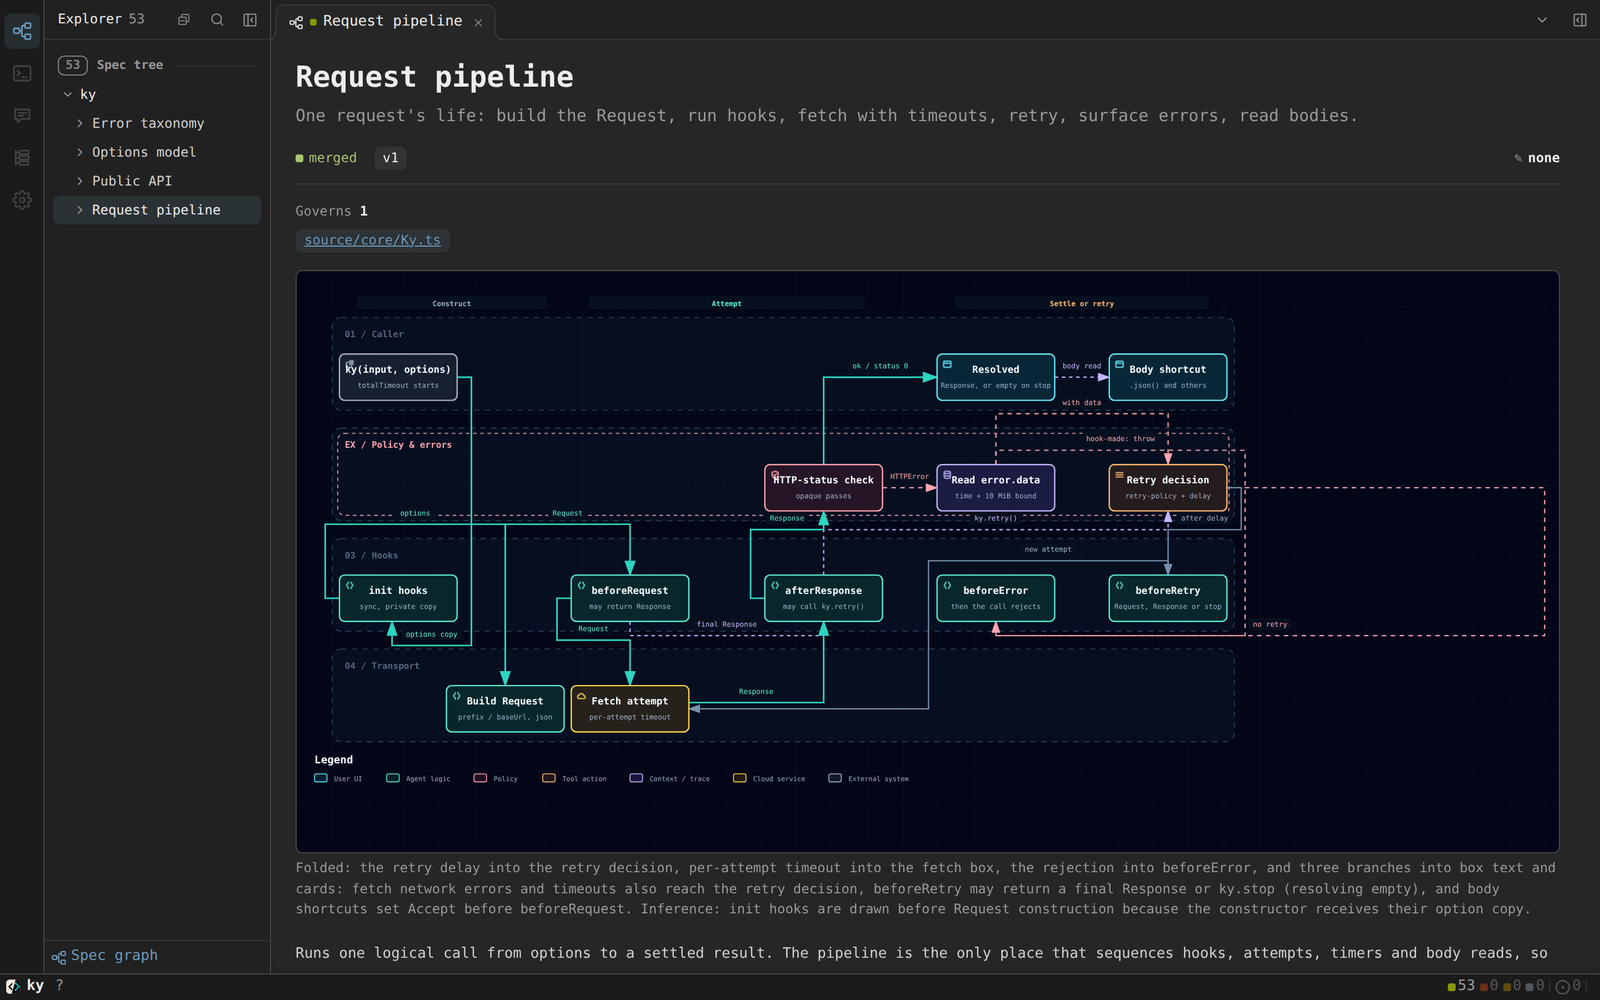
Flatcode shows open-source repositories drawn this way. Diagrams are rendered by archify (MIT).
PenguinHarness
PenguinHarness installs the same skill from its agent settings. Open Agents, choose the agent, open Settings, then the Skills tab, and select Import skill. Enter this source and send the prepared chat; the agent reads and reviews the skill before installing it:
The same dialog also accepts the skill as a zip. Once it is installed, ask the agent in a chat to draw the spec atlas of a repository.
ZCode and gugu install the atlas through their own mechanisms; the distribution README covers each one.
Install the CLI
SpexCode requires Node 22 and Git. Install the CLI once:
Adopt a repository
Inside the repository, choose the harnesses that should receive the workflow contract:
spex init --harness claude,codex,opencode,pi,zcode,claude-headless,opencode-headless,pi-headless,codex-headless
The example lists every built-in harness; keep the ones you use (any one ID or a comma-separated subset). init is additive: it seeds the starter .spec/ tree, writes .spec/spexcode.json, installs per-clone Git hooks, and writes the workflow instructions into the files your agent already reads, without overwriting your own prose. spex init --pure plants only the spec tree and its config, with no hooks.
Check the adoption before asking an agent to work:
doctor diagnoses the project's health. spec lint checks the spec-code graph; it is the command to run in CI as well as locally.
Start an ordinary agent
Launch claude or codex in the repository as usual. The materialized CLAUDE.md or AGENTS.md tells it where to find the governing spec, the manual, and the review flow. You can now say things such as:
- "Write specs for
src/authand anchor them to the functions they describe." - "Change the session expiry policy; update the spec and the implementation together."
- "Run
spex spec lint, resolve the blocking errors, and explain the remaining warnings." - "Run
/atlason this tree."
You review the resulting diff and merge proposal, not a transcript of shell commands.
What the files mean
The tracked data is deliberately small:
.spec/holds the spec nodes. A node'sspec.mddescribes present intent and names the code it governs..spec/spexcode.jsonholds portable project policy such as harness selection, governed roots and session settings. Machine-specific settings go in the ignored.spec/spexcode.local.json.
The materialized CLAUDE.md, AGENTS.md, .claude/, .codex/ and Git hooks are per-clone derived files. They are visible and removable, and never silently added to the project's tracked files. spex uninstall removes the generated footprint while keeping your spec data and prose.
Add the shared workspace when you need it
For a single agent, the direct path above is the whole workflow. When several projects or workers need a common view, install the dashboard once, then start the project backend and the host dashboard:
The backend serves this repository; one dashboard discovers and routes to every backend you run on the machine. Read Working with your agent before dispatching managed sessions.